動機
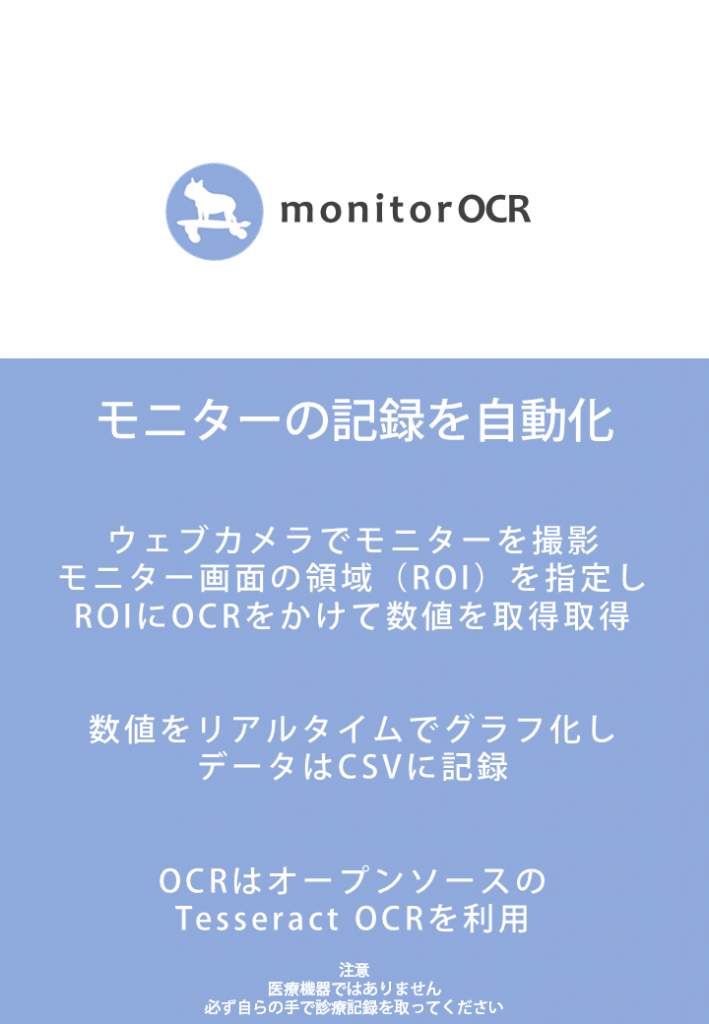
モニターに連続的に数値が現れ、それを手で紙に記入し続けるのはなかなか骨の折れる作業です。例えば、温度計、湿度計、麻酔モニター等様々なモニターがあります。パソコンにやらせたい!
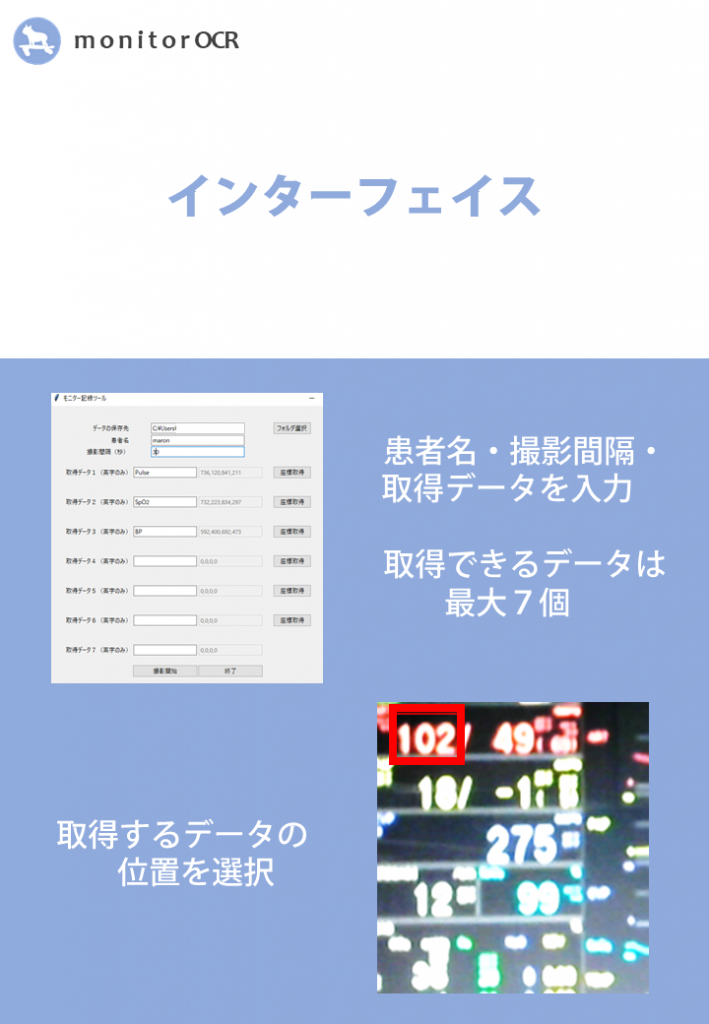
どうやってやろうか、モニターを写真とってOCR?写真のOCRだと、数字や文字がたくさんあって、ターゲットとなる数値だけを取り出せない。じゃあ、画像の指定したところだけをOCRすればいいのか!
OCR以外の方法(affine変換→CNNで学習)もできました。
使用上の注意点と免責事項
思い付きからツールを作ってみましたが、自らの手で数値を記録することは異常の発見に非常に重要だと思います。あくまで自ら診療記録をとっていただくようお願いいたします。
1.当プログラムをご利用する前に以下の免責事項に同意し、同意後にご利用を開始してください。
2.当プログラムのご利用者は、自らの行為に一切の責任を負うものとし、当ファイルによって生じた問題については、ご利用者自らで解決し、製作者は一切免責されるものとします。
3.製作者は、ご利用者のファイルの利用により発生した、ご利用者の損害又は第三者の損害に対し、いかなる責任も負いません。製作者は、当ファイル使用によるコンピューターシステムの破損、データ破損、得られたデータの不正確性及びそれ以外のいかなる原因に基づき生じた損害について賠償する義務を一切負わないものとします。
ツールの作成方法
パッケージのインストール
windowsはpythonをダウンロードしてください。https://www.python.jp/
コマンドプロンプトorターミナルで、以下を順に実行してください。
pip install pyocr
pip install Pillow
pip install opencv-python
pip install numpy
pip install matplotlib
OCRツールの入手
OCRツールとして、tesseract OCR を使用します。ウィンドウズは、こちらからダウンロードしてください。
https://github.com/UB-Mannheim/tesseract/wiki
Pythonファイルの作成
テキストファイルに以下のスクリプトをコピーし、ファイル名をmonitorOCR.pyとして名前をつけて保存してください。
その後、以下の方法でファイルを実行してください。
windowsなら、実行ファイルのパスをコピーし、コマンドプロンプトで以下を実行。
py C:\Users\Desktop\monitorOCR.py
Macなら、ターミナルで以下を実行。
python C:\Users\Desktop\monitorOCR.py
プログラミング的な解説は、こちらに記事にしています。
https://qiita.com/yuta-vet/items/7d626b2908e3bac7f97f
import tkinter
from tkinter import filedialog
import tkinter.ttk
import pyocr
import time
from PIL import Image, ImageTk
import cv2
import numpy as np
import matplotlib
matplotlib.use('TkAgg')
import matplotlib.pyplot as plt
import datetime
import csv
#################### function to close the tinker window ####################
def _destroyWindow(root):
root.quit()
root.destroy()
#################### function to ask which directly to use for saving csv ####################
def askfileplace():
cd = tkinter.filedialog.askdirectory()
global path
path.set(cd)
#################### click action while choosing area ####################
def start_point_get(event):
global start_x, start_y # these are the starting point of the coordinate
canvas1.delete("rect1")
canvas1.create_rectangle(event.x, # draw a rectangle
event.y,
event.x + 1,
event.y + 1,
outline="red",
tag="rect1")
start_x, start_y = event.x, event.y
#################### drag action while choosing area ####################
def rect_drawing(event):
# conditioned actions when the pointer is inside or outside of the canvas
if event.x < 0:
end_x = 0
else:
end_x = min(x_pixel, event.x)
if event.y < 0:
end_y = 0
else:
end_y = min(y_pixel, event.y)
# overwrite the rectangle
canvas1.coords("rect1", start_x, start_y, end_x, end_y)
#################### action after the draging action while choosing area ####################
def release_action(event,num):
global start_x
global start_y
global end_x
global end_y
start_x, start_y, end_x, end_y = [
round(n*RESIZE_RETIO) for n in canvas1.coords("rect1")
]
# these conditions are meant to assign corrdinates to proper variables.
# variable "num" corresponds to the number of the button that is pressed on the interface.
# each button has a link with a variable.
if num==1:
global coordinate1_start_x
global coordinate1_start_y
global coordinate1_end_x
global coordinate1_end_y
global coordinate1
coordinate1_start_x=start_x
coordinate1_start_y=start_y
coordinate1_end_x=end_x
coordinate1_end_y=end_y
coordinate1 = str(coordinate1_start_x) +","+ str(coordinate1_start_y) +","+ str(coordinate1_end_x) +","+ str(coordinate1_end_y)
elif num==2:
global coordinate2_start_x
global coordinate2_start_y
global coordinate2_end_x
global coordinate2_end_y
global coordinate2
coordinate2_start_x=start_x
coordinate2_start_y=start_y
coordinate2_end_x=end_x
coordinate2_end_y=end_y
coordinate2 = str(coordinate2_start_x) +","+ str(coordinate2_start_y) +","+ str(coordinate2_end_x) +","+ str(coordinate2_end_y)
elif num==3:
global coordinate3_start_x
global coordinate3_start_y
global coordinate3_end_x
global coordinate3_end_y
global coordinate3
coordinate3_start_x=start_x
coordinate3_start_y=start_y
coordinate3_end_x=end_x
coordinate3_end_y=end_y
coordinate3 = str(coordinate3_start_x) +","+ str(coordinate3_start_y) +","+ str(coordinate3_end_x) +","+ str(coordinate3_end_y)
elif num==4:
global coordinate4_start_x
global coordinate4_start_y
global coordinate4_end_x
global coordinate4_end_y
global coordinate4
coordinate4_start_x=start_x
coordinate4_start_y=start_y
coordinate4_end_x=end_x
coordinate4_end_y=end_y
coordinate4 = str(coordinate4_start_x) +","+ str(coordinate4_start_y) +","+ str(coordinate4_end_x) +","+ str(coordinate4_end_y)
elif num==5:
global coordinate5_start_x
global coordinate5_start_y
global coordinate5_end_x
global coordinate5_end_y
global coordinate5
coordinate5_start_x=start_x
coordinate5_start_y=start_y
coordinate5_end_x=end_x
coordinate5_end_y=end_y
coordinate5 = str(coordinate5_start_x) +","+ str(coordinate5_start_y) +","+ str(coordinate5_end_x) +","+ str(coordinate5_end_y)
elif num==6:
global coordinate6_start_x
global coordinate6_start_y
global coordinate6_end_x
global coordinate6_end_y
global coordinate6
coordinate6_start_x=start_x
coordinate6_start_y=start_y
coordinate6_end_x=end_x
coordinate6_end_y=end_y
coordinate6 = str(coordinate6_start_x) +","+ str(coordinate6_start_y) +","+ str(coordinate6_end_x) +","+ str(coordinate6_end_y)
elif num==7:
global coordinate7_start_x
global coordinate7_start_y
global coordinate7_end_x
global coordinate7_end_y
global coordinate7
coordinate7_start_x=start_x
coordinate7_start_y=start_y
coordinate7_end_x=end_x
coordinate7_end_y=end_y
coordinate7 = str(coordinate7_start_x) +","+ str(coordinate7_start_y) +","+ str(coordinate7_end_x) +","+ str(coordinate7_end_y)
cap.release()
_destroyWindow(root2) # destroy the tkinter window "root2"
main() # move back to the interface window
#################### function to specify the target area ####################
def preview(no):
global cap
cap = cv2.VideoCapture(0) # get the image from a camera. 0 means an internal camera or a first choice camera.
cap.set(cv2.CAP_PROP_FRAME_WIDTH, 1280) # We need a high resolusion image. Width should be 1280 at least.
cap.set(cv2.CAP_PROP_FRAME_HEIGHT, 720)
ret, img = cap.read() # extract a freeze frame from the image. "ret" is just whether successfully read or not. It is discarded here.
height,width,ch = cap.read()[1].shape # get the image size. "ch" is channel but it is not neccessary here.
global y_pixel
global x_pixel
y_pixel = int(height/RESIZE_RETIO) # the image is too big to show in tkinter. So, I resized by predifined retio.
x_pixel = int(width/RESIZE_RETIO)
img_resized = cv2.resize(img,(x_pixel,y_pixel)) # resize the image to fit tkinter
img_rgb = cv2.cvtColor(img_resized, cv2.COLOR_BGR2RGB) # convert BGR color to RGB color
image_pil = Image.fromarray(img_rgb) # convert a cv2 image to a pillow image, in other words, a pillow array.
global root2
root2 = tkinter.Tk() # create tkinter window named root2
root2.title('choose area') # title
root2.attributes("-topmost", True) # show tkinter at topmost
root2.geometry("{0}x{1}".format(x_pixel,y_pixel)) # adjest the window size so that it can fit the screen
global canvas1
canvas1 = tkinter.Canvas(master=root2,bg="black", width=x_pixel, height=y_pixel) # create a canvas named canvas1 within root2
img = ImageTk.PhotoImage(image_pil,master=root2) # create a tk image from the pillow image
canvas1.create_image(0, 0, image=img, anchor=tkinter.NW) # attach the tk image to canvas1. Create_image(x, y, [image] ,[anchor])
# Canvas widget to envoke the functions defined previously
canvas1.grid()
canvas1.bind("<ButtonPress-1>", start_point_get) # button press action
canvas1.bind("<Button1-Motion>", rect_drawing) # drag action
canvas1.bind("<ButtonRelease-1>", lambda event,num=no:release_action(event,num)) # release action. Lambda is used to pass a variable to the function "release_action".
# variable "num" corresponds to the button number pressed on the interface.
root2.mainloop()
#################### a function when the coordinate get button is pressed ####################
# this function is meant to destroy the interface window "root" and open the new tkinter window "root2"
def destroyandcreate(num,path,name,interval,d1,d1c,d2,d2c,d3,d3c,d4,d4c,d5,d5c,d6,d6c,d7,d7c):
global path_input
path_input = path
global name_input
name_input = name
global interval_input
interval_input = interval
global data1name
data1name=d1
global coordinate1
coordinate1=d1c
global data2name
data2name=d2
global coordinate2
coordinate2=d2c
global data3name
data3name=d3
global coordinate3
coordinate3=d3c
global data4name
data4name=d4
global coordinate4
coordinate4=d4c
global data5name
data5name=d5
global coordinate5
coordinate5=d5c
global data6name
data6name=d6
global coordinate6
coordinate6=d6c
global data7name
data7name=d7
global coordinate7
coordinate7=d7c
_destroyWindow(root) # destroy the interface window "root"
preview(num) # create the new tkinter window "root2"
#################### OCR function ####################
def ocr(path,name,interval,d1,d1c,d2,d2c,d3,d3c,d4,d4c,d5,d5c,d6,d6c,d7,d7c):
tools = pyocr.get_available_tools() # check if there is a available OCR tool
if len(tools) == 0: # when there is no tool
print("OCRソフトが見つかりません。")
sys.exit(1)
tool = tools[0] # tools can be multiple. Here it specifies tool 0.
data1list=[] # create a data1 list to stack results
data2list=[] # create a data2 list to stack results
data3list=[] # create a data3 list to stack results
data4list=[] # create a data4 list to stack results
data5list=[] # create a data5 list to stack results
data6list=[] # create a data6 list to stack results
data7list=[] # create a data7 list to stack results
time_stamp=[] # create a time list. This will be x axis of a graph.
while True:
cap = cv2.VideoCapture(0) # get the image from a camera. 0 means an internal camera or a first choice camera.
cap.set(cv2.CAP_PROP_FRAME_WIDTH, 1280) # We need a high resolusion image. Width should be 1280 at least.
cap.set(cv2.CAP_PROP_FRAME_HEIGHT, 720)
ret, image = cap.read() # extract a freeze frame from the image. "ret" is just whether successfully read or not. It is discarded here.
timestamp = datetime.datetime.now() # get time stamp
hour = timestamp.strftime('%H') # decomposition of timestamp
minute = timestamp.strftime('%M')
second = timestamp.strftime('%S')
second = str(round(int(second),-1)) # round the second
hour_minute_second = hour+":"+minute+":"+second # this string will be used as x axis of the graph
time_stamp.append(hour_minute_second) # append the string to the list named time_stamp
interval =int(interval) # interval is string at first. So we need to convert.
timestamp2 = timestamp + datetime.timedelta(0,interval) # Interval (seconds) is added to timestamp.
if not d1c == "0,0,0,0": # if the area has been choosen, show the rectangle on the image based on the coordinate.
cv2.rectangle(image, (coordinate1_start_x, coordinate1_start_y), (coordinate1_end_x, coordinate1_end_y), (255, 255, 255), 3)
if not d2c == "0,0,0,0":
cv2.rectangle(image, (coordinate2_start_x, coordinate2_start_y), (coordinate2_end_x, coordinate2_end_y), (255, 255, 255), 3)
if not d3c == "0,0,0,0":
cv2.rectangle(image, (coordinate3_start_x, coordinate3_start_y), (coordinate3_end_x, coordinate3_end_y), (255, 255, 255), 3)
if not d4c == "0,0,0,0":
cv2.rectangle(image, (coordinate4_start_x, coordinate4_start_y), (coordinate4_end_x, coordinate4_end_y), (255, 255, 255), 3)
if not d5c == "0,0,0,0":
cv2.rectangle(image, (coordinate5_start_x, coordinate5_start_y), (coordinate5_end_x, coordinate5_end_y), (255, 255, 255), 3)
if not d6c == "0,0,0,0":
cv2.rectangle(image, (coordinate6_start_x, coordinate6_start_y), (coordinate6_end_x, coordinate6_end_y), (255, 255, 255), 3)
if not d7c == "0,0,0,0":
cv2.rectangle(image, (coordinate7_start_x, coordinate7_start_y), (coordinate7_end_x, coordinate7_end_y), (255, 255, 255), 3)
cv2.putText(image,"Push ESC to terminate", (30, 30), cv2.FONT_HERSHEY_SIMPLEX, 1.0, (255, 255, 255), thickness=2) # show text on the image
cv2.imshow('Anesthesia Assistant', image) # show the video screen
# These image process is meant to improve the efficacy of OCR
img_gray = cv2.cvtColor(image, cv2.COLOR_BGR2GRAY) # covert BGR color to gray color
img_gray = cv2.medianBlur(img_gray,5) # blur the image
img_gray2 = cv2.bitwise_not(img_gray) # black and white reversal
image_pil = Image.fromarray(img_gray2) # convert a cv2 image to a pillow image, in other words, array.
if not d1c == "0,0,0,0": # if the area has been choosen,
img1 = image_pil.crop((coordinate1_start_x, coordinate1_start_y, coordinate1_end_x, coordinate1_end_y)) # crop the image based on the coordinate
data1 = tool.image_to_string(img1,lang="eng",builder=pyocr.builders.DigitBuilder(tesseract_layout=6)) # OCR. Get number from the cropped image
try: # if the ocr process successes, float conversion will success. Assign the text that I got by OCR.
data1list.append(float(data1))
except: # if the ocr process fails, float conversion will fail.Then assign None to the list.
data1list.append(None)
if not d2c == "0,0,0,0":
img2 = image_pil.crop((coordinate2_start_x, coordinate2_start_y, coordinate2_end_x, coordinate2_end_y))
data2 = tool.image_to_string(img2,lang="eng",builder=pyocr.builders.DigitBuilder(tesseract_layout=6))
try:
data2list.append(float(data2))
except:
data2list.append(None)
if not d3c == "0,0,0,0":
img3 = image_pil.crop((coordinate3_start_x, coordinate3_start_y, coordinate3_end_x, coordinate3_end_y))
data3 = tool.image_to_string(img3,lang="eng",builder=pyocr.builders.DigitBuilder(tesseract_layout=7))
try:
data3list.append(float(data3))
except:
data3list.append(None)
if not d4c == "0,0,0,0":
img4 = image_pil.crop((coordinate4_start_x, coordinate4_start_y, coordinate4_end_x, coordinate4_end_y))
data4 = tool.image_to_string(img4,lang="eng",builder=pyocr.builders.DigitBuilder(tesseract_layout=6))
try:
data4list.append(float(data4))
except:
data4list.append(None)
if not d5c == "0,0,0,0":
img5 = image_pil.crop((coordinate5_start_x, coordinate5_start_y, coordinate5_end_x, coordinate5_end_y))
data5 = tool.image_to_string(img2,lang="eng",builder=pyocr.builders.DigitBuilder(tesseract_layout=6))
try:
data5list.append(float(data5))
except:
data5list.append(None)
if not d6c == "0,0,0,0":
img6 = image_pil.crop((coordinate6_start_x, coordinate6_start_y, coordinate6_end_x, coordinate6_end_y))
data6 = tool.image_to_string(img6,lang="eng",builder=pyocr.builders.DigitBuilder(tesseract_layout=6))
try:
data6list.append(float(data6))
except:
data6list.append(None)
if not d7c == "0,0,0,0":
img7 = image_pil.crop((coordinate7_start_x, coordinate7_start_y, coordinate7_end_x, coordinate7_end_y))
data7 = tool.image_to_string(img7,lang="eng",builder=pyocr.builders.DigitBuilder(tesseract_layout=6))
try:
data7list.append(float(data7))
except:
data7list.append(None)
key = cv2.waitKey(int(1000*interval/2)) # wait for a key. If Esc is pushed, close the window.
if key == 27: # 27 means Esc
break # terminate the process
number_of_data=sum([(d1c!="0,0,0,0"),
(d2c!="0,0,0,0"),
(d3c!="0,0,0,0"),
(d4c!="0,0,0,0"),
(d5c!="0,0,0,0"),
(d6c!="0,0,0,0"),
(d7c!="0,0,0,0")]) # get how many variables which will be processed
# 1st order of if statement is meant to judge whether the matplotlib graph has been written already or not.
# If the graph has been written already (len(time_stamp>=2)), I need to close the graph first (plt.close) to create a new graph.
# 2nd order of if statement is meant to catch the number of variables which will be showed in graphs.
if len(time_stamp)==1:
if number_of_data==1:
fig, (ax1) = plt.subplots(1, sharex=True)
ax1.plot(time_stamp, data1list,color="blue") # x is timestamp list. y is data1list.
ax1.set_title(d1) # set title
fig.autofmt_xdate(rotation=45) # rotate the x axis
elif number_of_data==2:
fig, (ax1, ax2) = plt.subplots(2, sharex=True)
ax1.plot(time_stamp, data1list,color="blue")
ax1.set_title(d1)
ax2.plot(time_stamp, data2list,color="blue")
ax2.set_title(d2)
fig.autofmt_xdate(rotation=45)
elif number_of_data==3:
fig, (ax1, ax2,ax3) = plt.subplots(3, sharex=True)
ax1.plot(time_stamp, data1list,color="blue")
ax1.set_title(d1)
ax2.plot(time_stamp, data2list,color="blue")
ax2.set_title(d2)
ax3.plot(time_stamp, data2list,color="blue")
ax3.set_title(d3)
fig.autofmt_xdate(rotation=45)
elif number_of_data==4:
fig, (ax1, ax2,ax3,ax4) = plt.subplots(4, sharex=True)
ax1.plot(time_stamp, data1list,color="blue")
ax1.set_title(d1)
ax2.plot(time_stamp, data2list,color="blue")
ax2.set_title(d2)
ax3.plot(time_stamp, data2list,color="blue")
ax3.set_title(d3)
ax4.plot(time_stamp, data2list,color="blue")
ax4.set_title(d4)
fig.autofmt_xdate(rotation=45)
elif number_of_data==5:
fig, (ax1, ax2,ax3,ax4,ax5) = plt.subplots(5, sharex=True)
ax1.plot(time_stamp, data1list,color="blue")
ax1.set_title(d1)
ax2.plot(time_stamp, data2list,color="blue")
ax2.set_title(d2)
ax3.plot(time_stamp, data2list,color="blue")
ax3.set_title(d3)
ax4.plot(time_stamp, data2list,color="blue")
ax4.set_title(d4)
ax5.plot(time_stamp, data2list,color="blue")
ax5.set_title(d5)
fig.autofmt_xdate(rotation=45)
elif number_of_data==6:
fig, (ax1, ax2,ax3,ax4,ax5,ax6) = plt.subplots(6, sharex=True)
ax1.plot(time_stamp, data1list,color="blue")
ax1.set_title(d1)
ax2.plot(time_stamp, data2list,color="blue")
ax2.set_title(d2)
ax3.plot(time_stamp, data2list,color="blue")
ax3.set_title(d3)
ax4.plot(time_stamp, data2list,color="blue")
ax4.set_title(d4)
ax5.plot(time_stamp, data2list,color="blue")
ax5.set_title(d5)
ax6.plot(time_stamp, data2list,color="blue")
ax6.set_title(d6)
fig.autofmt_xdate(rotation=45)
elif number_of_data==7:
fig, (ax1, ax2,ax3,ax4,ax5,ax6,ax7) = plt.subplots(7, sharex=True)
ax1.plot(time_stamp, data1list,color="blue")
ax1.set_title(d1)
ax2.plot(time_stamp, data2list,color="blue")
ax2.set_title(d2)
ax3.plot(time_stamp, data2list,color="blue")
ax3.set_title(d3)
ax4.plot(time_stamp, data2list,color="blue")
ax4.set_title(d4)
ax5.plot(time_stamp, data2list,color="blue")
ax5.set_title(d5)
ax6.plot(time_stamp, data2list,color="blue")
ax6.set_title(d6)
ax7.plot(time_stamp, data2list,color="blue")
ax7.set_title(d7)
fig.autofmt_xdate(rotation=45)
else:
plt.close()
if number_of_data==1:
fig, (ax1) = plt.subplots(1, sharex=True)
ax1.plot(time_stamp, data1list,color="blue")
ax1.set_title(d1)
fig.autofmt_xdate(rotation=45)
elif number_of_data==2:
fig, (ax1, ax2) = plt.subplots(2, sharex=True)
ax1.plot(time_stamp, data1list,color="blue")
ax1.set_title(d1)
ax2.plot(time_stamp, data2list,color="blue")
ax2.set_title(d2)
fig.autofmt_xdate(rotation=45)
elif number_of_data==3:
fig, (ax1, ax2,ax3) = plt.subplots(3, sharex=True)
ax1.plot(time_stamp, data1list,color="blue")
ax1.set_title(d1)
ax2.plot(time_stamp, data2list,color="blue")
ax2.set_title(d2)
ax3.plot(time_stamp, data3list,color="blue")
ax3.set_title(d3)
fig.autofmt_xdate(rotation=45)
elif number_of_data==4:
fig, (ax1, ax2,ax3,ax4) = plt.subplots(4, sharex=True)
ax1.plot(time_stamp, data1list,color="blue")
ax1.set_title(d1)
ax2.plot(time_stamp, data2list,color="blue")
ax2.set_title(d2)
ax3.plot(time_stamp, data3list,color="blue")
ax3.set_title(d3)
ax4.plot(time_stamp, data4list,color="blue")
ax4.set_title(d4)
fig.autofmt_xdate(rotation=45)
elif number_of_data==5:
fig, (ax1, ax2,ax3,ax4,ax5) = plt.subplots(5, sharex=True)
ax1.plot(time_stamp, data1list,color="blue")
ax1.set_title(d1)
ax2.plot(time_stamp, data2list,color="blue")
ax2.set_title(d2)
ax3.plot(time_stamp, data3list,color="blue")
ax3.set_title(d3)
ax4.plot(time_stamp, data4list,color="blue")
ax4.set_title(d4)
ax5.plot(time_stamp, data5list,color="blue")
ax5.set_title(d5)
fig.autofmt_xdate(rotation=45)
elif number_of_data==6:
fig, (ax1, ax2,ax3,ax4,ax5,ax6) = plt.subplots(6, sharex=True)
ax1.plot(time_stamp, data1list,color="blue")
ax1.set_title(d1)
ax2.plot(time_stamp, data2list,color="blue")
ax2.set_title(d2)
ax3.plot(time_stamp, data3list,color="blue")
ax3.set_title(d3)
ax4.plot(time_stamp, data4list,color="blue")
ax4.set_title(d4)
ax5.plot(time_stamp, data5list,color="blue")
ax5.set_title(d5)
ax6.plot(time_stamp, data6list,color="blue")
ax6.set_title(d6)
fig.autofmt_xdate(rotation=45)
elif number_of_data==7:
fig, (ax1, ax2,ax3,ax4,ax5,ax6,ax7) = plt.subplots(7, sharex=True)
ax1.plot(time_stamp, data1list,color="blue")
ax1.set_title(d1)
ax2.plot(time_stamp, data2list,color="blue")
ax2.set_title(d2)
ax3.plot(time_stamp, data3list,color="blue")
ax3.set_title(d3)
ax4.plot(time_stamp, data4list,color="blue")
ax4.set_title(d4)
ax5.plot(time_stamp, data5list,color="blue")
ax5.set_title(d5)
ax6.plot(time_stamp, data6list,color="blue")
ax6.set_title(d6)
ax7.plot(time_stamp, data7list,color="blue")
ax7.set_title(d7)
fig.autofmt_xdate(rotation=45)
# write CSV file with resutls
with open('{0}\\{1}.csv'.format(path,name), 'w',newline="") as f:
writer = csv.writer(f)
writer.writerow(["Time",d1, d2, d3, d4, d5, d6, d7]) # set column names
if number_of_data==1:
for i in range(len(data1list)):
writer.writerow([time_stamp[i],data1list[i],0,0,0,0,0,0])
elif number_of_data==2:
for i in range(len(data1list)):
writer.writerow([time_stamp[i],data1list[i],data2list[i],0,0,0,0,0])
elif number_of_data==3:
for i in range(len(data1list)):
writer.writerow([time_stamp[i],data1list[i],data2list[i] ,data3list[i],0,0,0,0])
elif number_of_data==4:
for i in range(len(data1list)):
writer.writerow([time_stamp[i],data1list[i],data2list[i] ,data3list[i] ,data4list[i],0,0,0])
elif number_of_data==5:
for i in range(len(data1list)):
writer.writerow([time_stamp[i],data1list[i],data2list[i] ,data3list[i] ,data4list[i] ,data5list[i] ,0,0])
elif number_of_data==6:
for i in range(len(data1list)):
writer.writerow([time_stamp[i],data1list[i],data2list[i] ,data3list[i] ,data4list[i] ,data5list[i] ,data6list[i] ,0])
elif number_of_data==7:
for i in range(len(data1list)):
writer.writerow([time_stamp[i],data1list[i],data2list[i] ,data3list[i] ,data4list[i] ,data5list[i] ,data6list[i] ,data7list[i]])
# calculate the seconds remaining to the next roop
timestamp3 = datetime.datetime.now() # get time
difftime=timestamp2-timestamp3 # calculate the remaining time.
diffsec = int(difftime.seconds) # get seconds
plt.pause(diffsec) # wait for remaining seconds
cap.release() # releas the image capture from the camera
cv2.destroyAllWindows() # destroy the cv2 window
#################### function to create a interface ####################
def main():
global root
root = tkinter.Tk()
root.title('monitorOCR')
root.resizable(True, True)
frame1 = tkinter.ttk.Frame(root, padding=(32))
frame1.grid()
#create path text
label1 = tkinter.ttk.Label(frame1, text='データの保存先', padding=(5, 2))
label1.grid(row=1, column=0, sticky=tkinter.E)
# create path textboxes
global path
path =tkinter.StringVar()
path_entry = tkinter.ttk.Entry(frame1,textvariable=path,width=30)
path_entry.insert(0,path_input)
path_entry.grid(row=1, column=1,columnspan=2)
# create file dialog
path_button = tkinter.ttk.Button(frame1,text="フォルダ選択",command= lambda : [askfileplace()] )
path_button.grid(row=1, column=3)
# create patient text
label2 = tkinter.ttk.Label(frame1, text='患者名', padding=(5, 2))
label2.grid(row=3, column=0, sticky=tkinter.E)
# create patient textboxes
name = tkinter.StringVar()
name_entry = tkinter.ttk.Entry(frame1,textvariable=name,width=30)
name_entry.insert(0,name_input)
name_entry.grid(row=3, column=1,columnspan=2)
# create interval text
label10 = tkinter.ttk.Label(frame1, text='撮影間隔(秒)', padding=(5, 2))
label10.grid(row=4, column=0, sticky=tkinter.E)
# create patient textboxes
interval = tkinter.StringVar()
interval_entry = tkinter.ttk.Entry(frame1,textvariable=interval,width=30)
interval_entry.insert(0,interval_input)
interval_entry.grid(row=4, column=1,columnspan=2)
# create data 1
label3 = tkinter.ttk.Label(frame1, text='取得データ1(英字のみ)')
label3.grid(row=5, column=0,pady=20)
# create data1 name textbox
target1 = tkinter.StringVar()
tagert1_entry = tkinter.ttk.Entry(frame1,textvariable=target1,width=20)
tagert1_entry.insert(0,data1name)
tagert1_entry.grid(row=5, column=1)
# create data1 coordinate textbox
global target1_coord
target1_coord = tkinter.StringVar()
target1_coord_entry = tkinter.ttk.Entry(frame1,textvariable=target1_coord,width=20)
target1_coord_entry.insert(0,coordinate1)
target1_coord_entry.configure(state="disabled")
target1_coord_entry.grid(row=5, column=2)
# create data1 coordinate get button
target1_coord_button = tkinter.ttk.Button(frame1, text='座標取得',command= lambda : [destroyandcreate(1,path.get(),
name.get(),
interval.get(),
target1.get(),
target1_coord.get(),
target2.get(),
target2_coord.get(),
target3.get(),
target3_coord.get(),
target4.get(),
target4_coord.get(),
target5.get(),
target5_coord.get(),
target6.get(),
target6_coord.get(),
target7.get(),
target7_coord.get())] )
target1_coord_button.grid(row=5,column=3,padx=20)
# create data 2
label4 = tkinter.ttk.Label(frame1, text='取得データ2(英字のみ)')
label4.grid(row=6, column=0,pady=20)
# create data2 name textbox
target2 = tkinter.StringVar()
tagert2_entry = tkinter.ttk.Entry(frame1,textvariable=target2,width=20)
tagert2_entry.insert(0,data2name)
tagert2_entry.grid(row=6, column=1)
# create data2 coordinate textbox
global target2_coord
target2_coord = tkinter.StringVar()
target2_coord_entry = tkinter.ttk.Entry(frame1,textvariable=target2_coord,width=20)
target2_coord_entry.insert(0,coordinate2)
target2_coord_entry.configure(state="disabled")
target2_coord_entry.grid(row=6, column=2)
# create data2 coordinate get button
target2_coord_button = tkinter.ttk.Button(frame1, text='座標取得',command= lambda : [destroyandcreate(2,path.get(),
name.get(),
interval.get(),
target1.get(),
target1_coord.get(),
target2.get(),
target2_coord.get(),
target3.get(),
target3_coord.get(),
target4.get(),
target4_coord.get(),
target5.get(),
target5_coord.get(),
target6.get(),
target6_coord.get(),
target7.get(),
target7_coord.get())] )
target2_coord_button.grid(row=6, column=3,padx=20)
# create data 3
label5 = tkinter.ttk.Label(frame1, text='取得データ3(英字のみ)')
label5.grid(row=7, column=0,pady=20)
# create data3 name textbox
target3 = tkinter.StringVar()
tagert3_entry = tkinter.ttk.Entry(frame1,textvariable=target3,width=20)
tagert3_entry.insert(0,data3name)
tagert3_entry.grid(row=7, column=1)
# create data3 coordinate textbox
global target3_coord
target3_coord = tkinter.StringVar()
target3_coord_entry = tkinter.ttk.Entry(frame1,textvariable=target3_coord,width=20)
target3_coord_entry.insert(0,coordinate3)
target3_coord_entry.configure(state="disabled")
target3_coord_entry.grid(row=7, column=2)
# create data3 coordinate get button
target3_coord_button = tkinter.ttk.Button(frame1, text='座標取得',command= lambda : [destroyandcreate(3,path.get(),
name.get(),
interval.get(),
target1.get(),
target1_coord.get(),
target2.get(),
target2_coord.get(),
target3.get(),
target3_coord.get(),
target4.get(),
target4_coord.get(),
target5.get(),
target5_coord.get(),
target6.get(),
target6_coord.get(),
target7.get(),
target7_coord.get())] )
target3_coord_button.grid(row=7, column=3,padx=20)
# create data 4
label6 = tkinter.ttk.Label(frame1, text='取得データ4(英字のみ)')
label6.grid(row=8,column=0,pady=20)
# create data4 name textbox
target4 = tkinter.StringVar()
tagert4_entry = tkinter.ttk.Entry(frame1,textvariable=target4,width=20)
tagert4_entry.insert(0,data4name)
tagert4_entry.grid(row=8, column=1)
# create data4 coordinate textbox
global target4_coord
target4_coord = tkinter.StringVar()
target4_coord_entry = tkinter.ttk.Entry(frame1,textvariable=target4_coord,width=20)
target4_coord_entry.insert(0,coordinate4)
target4_coord_entry.configure(state="disabled")
target4_coord_entry.grid(row=8, column=2)
# create data4 coordinate get button
target4_coord_button = tkinter.ttk.Button(frame1, text='座標取得',command= lambda : [destroyandcreate(4,path.get(),
name.get(),
interval.get(),
target1.get(),
target1_coord.get(),
target2.get(),
target2_coord.get(),
target3.get(),
target3_coord.get(),
target4.get(),
target4_coord.get(),
target5.get(),
target5_coord.get(),
target6.get(),
target6_coord.get(),
target7.get(),
target7_coord.get())] )
target4_coord_button.grid(row=8, column=3,padx=20)
# create data 5
label7 = tkinter.ttk.Label(frame1, text='取得データ5(英字のみ)')
label7.grid(row=9, column=0,pady=20)
# create data5 name textbox
target5 = tkinter.StringVar()
tagert5_entry = tkinter.ttk.Entry(frame1,textvariable=target5,width=20)
tagert5_entry.insert(0,data5name)
tagert5_entry.grid(row=9, column=1)
# create data5 coordinate textbox
global target5_coord
target5_coord = tkinter.StringVar()
target5_coord_entry = tkinter.ttk.Entry(frame1,textvariable=target5_coord,width=20)
target5_coord_entry.insert(0,coordinate5)
target5_coord_entry.configure(state="disabled")
target5_coord_entry.grid(row=9, column=2)
# create data5 coordinate get button
target5_coord_button = tkinter.ttk.Button(frame1, text='座標取得',command= lambda : [destroyandcreate(5,path.get(),
name.get(),
interval.get(),
target1.get(),
target1_coord.get(),
target2.get(),
target2_coord.get(),
target3.get(),
target3_coord.get(),
target4.get(),
target4_coord.get(),
target5.get(),
target5_coord.get(),
target6.get(),
target6_coord.get(),
target7.get(),
target7_coord.get())] )
target5_coord_button.grid(row=9, column=3,padx=20)
# create data 6
label8 = tkinter.ttk.Label(frame1, text='取得データ6(英字のみ)')
label8.grid(row=10, column=0,pady=20)
# create data6 name textbox
target6 = tkinter.StringVar()
tagert6_entry = tkinter.ttk.Entry(frame1,textvariable=target6,width=20)
tagert6_entry.insert(0,data6name)
tagert6_entry.grid(row=10, column=1)
# create data6 coordinate textbox
global target6_coord
target6_coord = tkinter.StringVar()
target6_coord_entry = tkinter.ttk.Entry(frame1,textvariable=target6_coord,width=20)
target6_coord_entry.insert(0,coordinate6)
target6_coord_entry.configure(state="disabled")
target6_coord_entry.grid(row=10, column=2)
# create data6 coordinate get button
target6_coord_button = tkinter.ttk.Button(frame1, text='座標取得',command= lambda : [destroyandcreate(6,path.get(),
name.get(),
interval.get(),
target1.get(),
target1_coord.get(),
target2.get(),
target2_coord.get(),
target3.get(),
target3_coord.get(),
target4.get(),
target4_coord.get(),
target5.get(),
target5_coord.get(),
target6.get(),
target6_coord.get(),
target7.get(),
target7_coord.get())] )
target6_coord_button.grid(row=10, column=3,padx=20)
# create data 7
label9 = tkinter.ttk.Label(frame1, text='取得データ7(英字のみ)')
label9.grid(row=11, column=0,pady=20)
# create data7 name textbox
target7 = tkinter.StringVar()
tagert7_entry = tkinter.ttk.Entry(frame1,textvariable=target7,width=20)
tagert7_entry.insert(0,data7name)
tagert7_entry.grid(row=11, column=1)
# create data7 coordinate textbox
global target7_coord
target7_coord = tkinter.StringVar()
target7_coord_entry = tkinter.ttk.Entry(frame1,textvariable=target7_coord,width=20)
target7_coord_entry.insert(0,coordinate7)
target7_coord_entry.configure(state="disabled")
target7_coord_entry.grid(row=11, column=2)
# create data7 coordinate get button
target7_coord_button = tkinter.ttk.Button(frame1, text='座標取得',command= lambda : [destroyandcreate(7,path.get(),
name.get(),
interval.get(),
target1.get(),
target1_coord.get(),
target2.get(),
target2_coord.get(),
target3.get(),
target3_coord.get(),
target4.get(),
target4_coord.get(),
target5.get(),
target5_coord.get(),
target6.get(),
target6_coord.get(),
target7.get(),
target7_coord.get())] )
target7_coord_button.grid(row=9, column=3,padx=20)
# 撮影開始button
button = tkinter.ttk.Button(
frame1, text='撮影開始',
width = 20,
command= lambda : [ocr(path.get(),
name.get(),
interval.get(),
target1.get(),
target1_coord.get(),
target2.get(),
target2_coord.get(),
target3.get(),
target3_coord.get(),
target4.get(),
target4_coord.get(),
target5.get(),
target5_coord.get(),
target6.get(),
target6_coord.get(),
target7.get(),
target7_coord.get())] )
button.grid(row=12, column=1)
# 終了button
button2 = tkinter.ttk.Button(frame1, text='終了',width = 20,command= lambda : [_destroyWindow(root)])
button2.grid(row=12, column=2)
root.mainloop()
#################### initial parameters ####################
coordinate1_start_x=0
coordinate1_start_y=0
coordinate1_end_x=0
coordinate1_end_y=0
coordinate1 = str(coordinate1_start_x) +","+ str(coordinate1_start_y) +","+ str(coordinate1_end_x) +","+ str(coordinate1_end_y)
coordinate2_start_x=0
coordinate2_start_y=0
coordinate2_end_x=0
coordinate2_end_y=0
coordinate2 = str(coordinate1_start_x) +","+ str(coordinate1_start_y) +","+ str(coordinate1_end_x) +","+ str(coordinate1_end_y)
coordinate3_start_x=0
coordinate3_start_y=0
coordinate3_end_x=0
coordinate3_end_y=0
coordinate3 = str(coordinate1_start_x) +","+ str(coordinate1_start_y) +","+ str(coordinate1_end_x) +","+ str(coordinate1_end_y)
coordinate4_start_x=0
coordinate4_start_y=0
coordinate4_end_x=0
coordinate4_end_y=0
coordinate4 = str(coordinate1_start_x) +","+ str(coordinate1_start_y) +","+ str(coordinate1_end_x) +","+ str(coordinate1_end_y)
coordinate5_start_x=0
coordinate5_start_y=0
coordinate5_end_x=0
coordinate5_end_y=0
coordinate5 = str(coordinate1_start_x) +","+ str(coordinate1_start_y) +","+ str(coordinate1_end_x) +","+ str(coordinate1_end_y)
coordinate6_start_x=0
coordinate6_start_y=0
coordinate6_end_x=0
coordinate6_end_y=0
coordinate6 = str(coordinate1_start_x) +","+ str(coordinate1_start_y) +","+ str(coordinate1_end_x) +","+ str(coordinate1_end_y)
coordinate7_start_x=0
coordinate7_start_y=0
coordinate7_end_x=0
coordinate7_end_y=0
coordinate7 = str(coordinate1_start_x) +","+ str(coordinate1_start_y) +","+ str(coordinate1_end_x) +","+ str(coordinate1_end_y)
name_input=""
path_input=""
interval_input=30
data1name=""
data2name=""
data3name=""
data4name=""
data5name=""
data6name=""
data7name=""
RESIZE_RETIO=1.4
main() # call the function to create a interface.


