
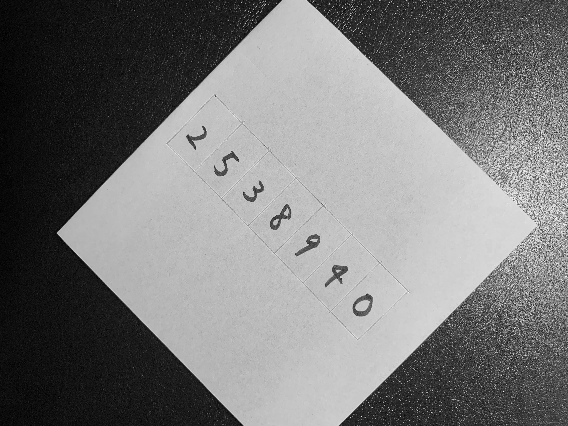
この数字が映っている画像を

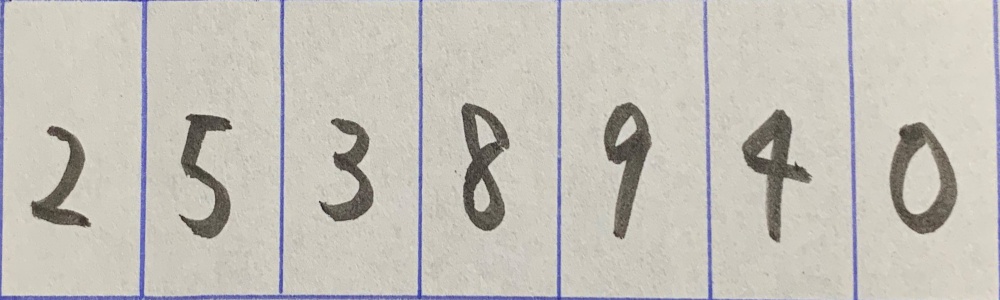
こうやって数字だけを取り出したいです。
青い四角の4頂点の座標がわかればアフィン変換を実施して、数字だけを取り出すことができます。4頂点の座標を自動で取得したいと思います。
試行錯誤の記録を残しておきます。(最終的にはarucoマーカーを使うべきとの結論に至りました)
試行1 RGBの青色だけを取り出せばいいのではないか?
青色の枠は、Bの数値が高いのでそれを利用してedge detectionをすればいいのではないか。
img = cv2.imread("C:\\Users\\tegaki_1.jpg")
img_resize = cv2.resize(img, (img.shape[1]//7,img.shape[0]//7))
img_B = img_resize[:,:,0]
cv2.imshow('image',img_B)
cv2.waitKey()
結論:失敗。青が白に消えてしまった。
原因:白色もBの数値も数値も高かった
試行2 HSVのHueで青色の部分だけ取り出したらいいのではないか?
H:Hue(色相)
S:Satulation(彩度)
V:Value(明度)
カラースペースをHSVに変換します。cv2で画像を読み込むとデフォルトはBGRです。
import cv2
img = cv2.imread("C:\\Users\\tegaki_1.jpg")
img_resize = cv2.resize(img, (img.shape[1]//7,img.shape[0]//7))
img_hsv = cv2.cvtColor(img_resize, cv2.COLOR_BGR2HSV)
img_H = img_hsv[:,:,0]
cv2.imshow('image',img_H)
cv2.waitKey()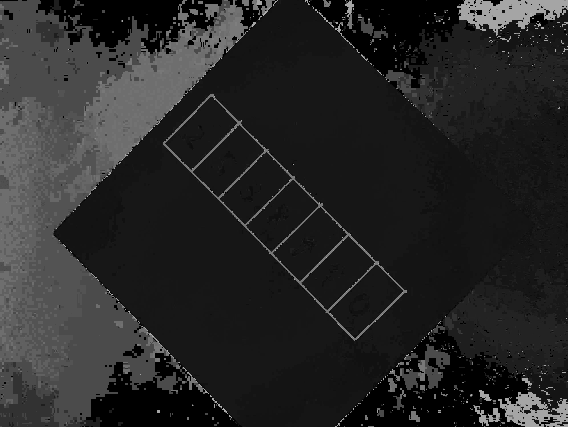
img_hsvは、numpy.ndarrayです。(432, 576, 3)といった形をしています。最後の3は、HSVの情報です。今回必要なのは、Hの情報だけなのでimg_H = img_hsv[:,:,0]でスライスしています。
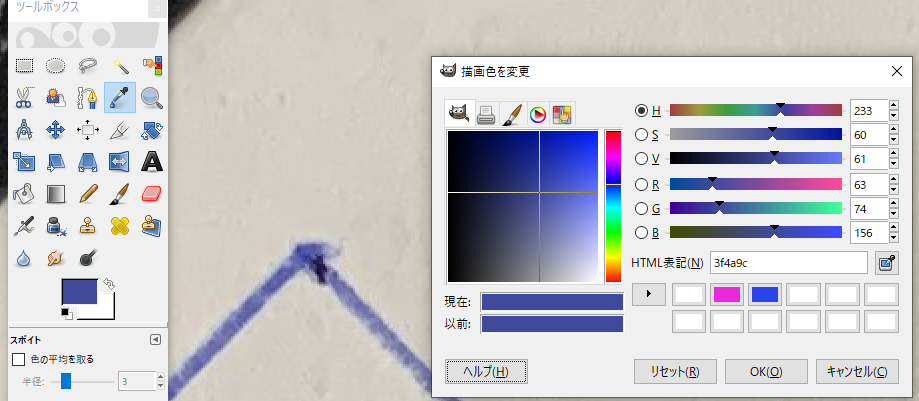
Hueの値は0~179までです。目的としている青色が、どの数値になるか知りたい場合には少し工夫が必要です。まず、Gimpを使ってその場所のRGBの数値を把握します。
以下は、スポイトツールを使って青枠のRGBの値を確認しているところです。HSVも表示されていますが、gimpのHの値は(0~360)です。一方、cv2は(0~179)までです。gimpのH (233)× 179/360 = cv2のH(116)です。
一方コードでHを確認するには、以下のコードです。
targetcolor = np.uint8([[[156,74,63]]]) # BGRの順
hsv_targetcolor = cv2.cvtColor(targetcolor,cv2.COLOR_BGR2HSV)
print(hsv_targetcolor)
[[[116 152 156]]] 116がH
Hが116だとわかりました。
それでは、Hの116付近の数値のみをピックアップすればうまく枠を抽出できるのではないかと考え、実行してみます。cv2.thresholdは、1値のみを境界にするため使えません。ある値より上、下ではなく、今回はある値の付近を抽出したいのです。numpy arrayの機能を使います。
boolean =  (img_H < 125) & (img_H > 120)
img_H_2 = boolean*179
img_H_2.dtype #int32 符号あり32ビット整数型
img_H_2 = img_H_2.astype('uint8') #int32だとエラーになるから変換
img_H_2.dtype #uint8 符号なし8ビット整数型

cv2.imshow('image',img_H_2)
cv2.waitKey()
boolean = (img_H < 125) & (img_H > 120) は、そのTrueとFalseのarrayを作ります。125と120は試行錯誤して数値を決めます。
img_H_2 = boolean*179 は、Trueは1と同じなので数値をかけるとその数値になります。Falseは0と同じです。179はHの最高数値です。
img_H_2 = img_H_2.astype(‘uint8’)は、データタイプを合わせるためです。このデータタイプ変換がないと画像を表示することができません。uint8 符号なし8ビット整数型に変換します。
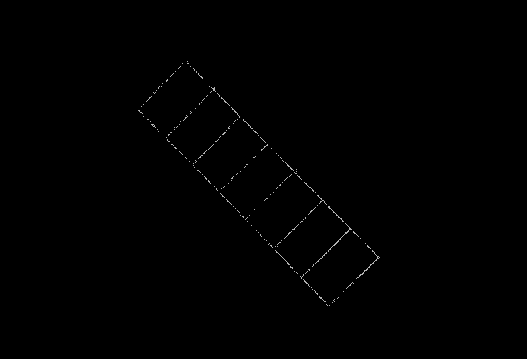
うまく抽出できたので、canny edge detectionを実施してみます。
img_H_canny = cv2.Canny(img_H_2,0,1) #数字は試行錯誤が必要
cv2.imshow('image',img_H_canny)
cv2.waitKey()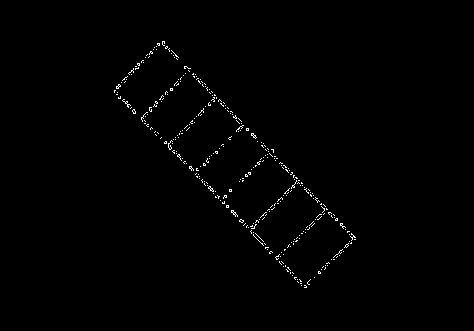
さっそくfindContoursをしてみます。
contours,hierarchy = cv2.findContours(img_H_canny,cv2.RETR_LIST, cv2.CHAIN_APPROX_SIMPLE)contoursの数が377個もできてしまいました。失敗です。
試行3 Canny edge detection → findContours
原点回帰して、いきなりCanny edge detectionを実施します。
img = cv2.imread("C:\\Users\\tegaki_1.jpg")
img = cv2.resize(img, (img.shape[1]//7,img.shape[0]//7))
img_canny = cv2.Canny(img,200,700) #試行錯誤が必要
contours,hierarchy = cv2.findContours(img_canny,cv2.RETR_LIST, cv2.CHAIN_APPROX_SIMPLE)
cv2.imshow('image',img_canny)
cv2.waitKey()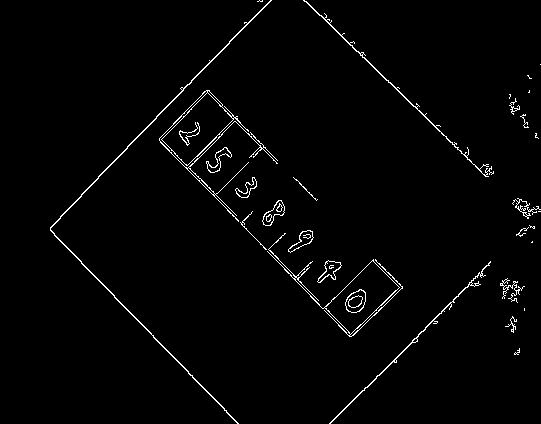
上の画像を使ってfindcontoursをします。
contours,hierarchy = cv2.findContours(img_canny,cv2.RETR_LIST, cv2.CHAIN_APPROX_SIMPLE)
img2 = cv2.drawContours(img.copy(), contours, -1, color=(255,255,255),thickness=5)
cv2.imshow('image',img2)
cv2.waitKey()
75個の輪郭ができてしまいました。でも、先ほどの青色成分だけ取り出した時よりましです。不必要な画像処理に時間をかけてしまいました。
細かい輪郭を削除して、輪郭の近似を行ってみます。
cv2.contourArea(cnt)で輪郭の面積を計算します。小さいのは無視します。
epsilonとapproxで輪郭の近似を行います。
selected_contours = []

for cnt in contours:
    if cv2.contourArea(cnt)>1000: #数字は試行錯誤が必要
        epsilon = 0.01*cv2.arcLength(cnt,True) #数字は試行錯誤が必要
        approx = cv2.approxPolyDP(cnt,epsilon,True)
        selected_contours.append(approx)

img2 = cv2.drawContours(img.copy(), selected_contours, -1, color=(255,255,255),thickness=3)
cv2.imshow('image',img2)
cv2.waitKey()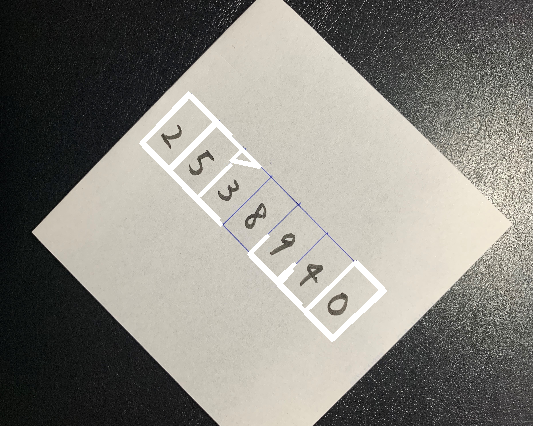
欲しいのは青枠の頂点4か所です。今のところ、頂点の座標は手に入っているはずです。しかし、arrayのどこにあるかわかりません。そのため、頂点4つを見つけ出すアルゴリズムを考えてみます。
四角の左上は、画像の左上から一番近い
四角の右上は、画像の右上から一番近い
四角の左下は、画像の左下から一番近い
四角の右下は、画像の右下から一番近い
という仮定のもと、画像の4端からの距離を求めて、4端からの最短距離にある座標を採用します。
x_px = img_canny.shape[0]
y_px = img_canny.shape[1]

top_left = []
top_right = []
bottom_left = []
bottom_right = []

longest = math.sqrt(x_px**2 + y_px**2)

dist_from_top_left_min = longest
dist_from_top_right_min = longest
dist_from_bottom_left_min = longest
dist_from_bottom_right_min = longest

for cnts in selected_contours:
    for cnt in cnts:
        x = cnt[0][0]
        y = cnt[0][1]
        dist_from_top_left = math.sqrt( x**2 + y**2 )
        dist_from_top_right = math.sqrt( (x_px-x)**2 + y**2 )
        dist_from_bottom_left = math.sqrt( x**2 + (y_px-y)**2 )
        dist_from_bottom_right = math.sqrt( (x_px-x)**2 + (y_px-y)**2 )
        if  dist_from_top_left_min > dist_from_top_left:
            dist_from_top_left_min = dist_from_top_left
            top_left = cnt
        if  dist_from_top_right_min >  dist_from_top_right:
            dist_from_top_right_min = dist_from_top_right
            top_right = cnt
        if  dist_from_bottom_left_min >  dist_from_bottom_left:
            dist_from_bottom_left_min = dist_from_bottom_left
            bottom_left = cnt
        if  dist_from_bottom_right_min >  dist_from_bottom_right:
            dist_from_bottom_right_min = dist_from_bottom_right
            bottom_right = cnt

four_corners = [top_left,top_right,bottom_left,bottom_right]

img3 = cv2.drawContours(img.copy(), four_corners, -1, color=(255,255,255),thickness=5)
cv2.imshow('image',img3)
cv2.waitKey()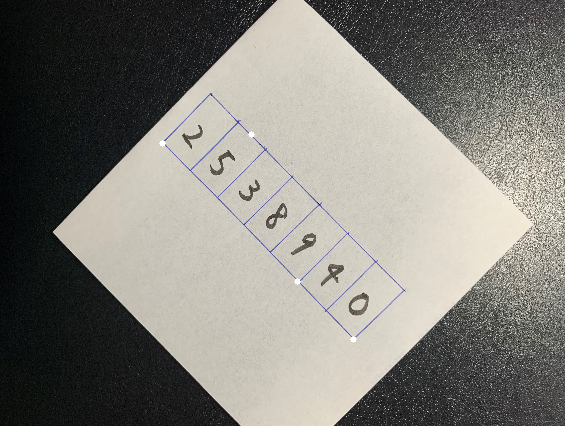
2点以外はうまくいきませんでした。
画像の左上から近い点を確認してみます。
img2 = cv2.drawContours(img.copy(), selected_contours, -1, color=(255,255,255),thickness=3)
img4 = cv2.circle(img2.copy(),(0,0), 221, (255,255,255), 1)
cv2.imshow('image',img4)
cv2.waitKey()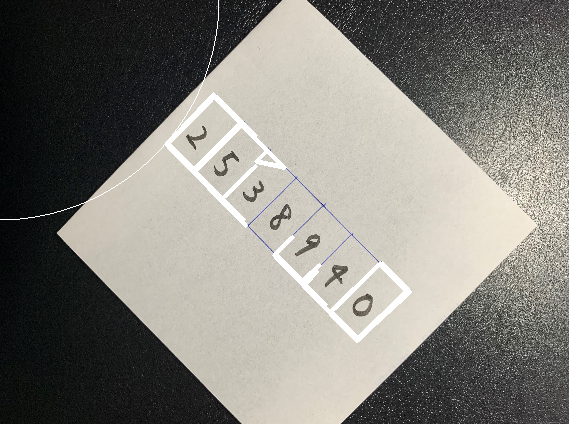
全然だめですね。仮定が間違っていました。
試行4 ARUCOマーカーを使う
ARUCOマーカーを使えば、位置の特定が容易です。ただ単に、その存在を知りませんでした。
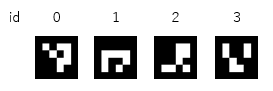
まず、ARUCOマーカーを作成します。
aruco = cv2.aruco
aruco_dict = aruco.getPredefinedDictionary(aruco.DICT_4X4_50)
for i in range(4): # 4は作る枚数
aruco_img = aruco.drawMarker(aruco_dict, i, 75) # 75x75 px
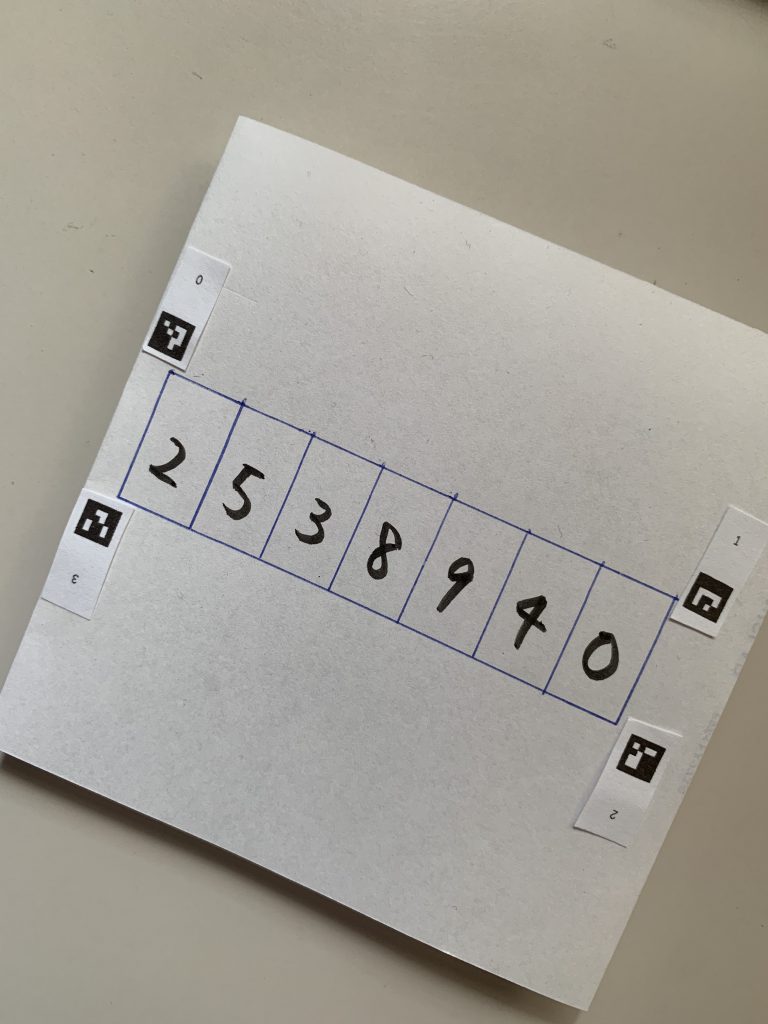
cv2.imwrite(f"C:\\Users\\marker{i}.png", aruco_img)それを印刷して、青枠の近くに置きました。
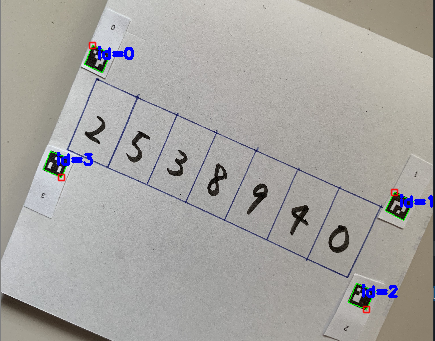
検出してみます。
corners, ids, __ = aruco.detectMarkers(img, aruco_dict)
入力
画像
arucoマーカーを作成したときのaruco辞書
出力
corners:マーカーの4点の座標を持っています。左上から時計回りの順番です。
ids:cornersに入っている座標の順番と、アルコマーカーのidをリンクさせる情報を持っています。
img = cv2.imread(r"C:\Users\pic_arco.jpg")
img = cv2.resize(img, (img.shape[1]//7,img.shape[0]//7))
corners, ids, rejectedImgPoints = aruco.detectMarkers(img, aruco_dict)
img_marked = aruco.drawDetectedMarkers(img.copy(), corners, ids)
cv2.imshow('image',img_marked)
cv2.waitKey()
arucoマーカーの上下左右が結構重要だと気付きました。
arucoマーカーの左上を合わせたいです。
arucoマーカーの置き方を変えてもう一度、やり直しました。
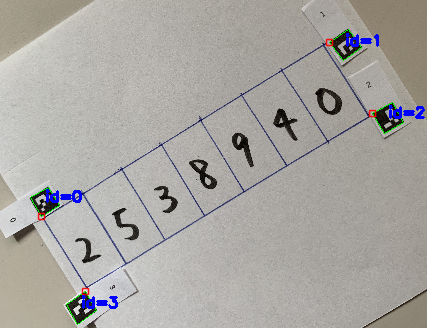
赤い四角の座標を取り出します。
index_0 = np.where(ids == 0)[0][0]
index_1 = np.where(ids == 1)[0][0]
index_2 = np.where(ids == 2)[0][0]
index_3 = np.where(ids == 3)[0][0]

corner_0 = corners[index_0][0][0]
corner_1 = corners[index_1][0][0]
corner_2 = corners[index_2][0][0]
corner_3 = corners[index_3][0][0]

#上記で入手した座標を使って四角を書いてみる
pts = np.array([corner_0,corner_1,corner_2,corner_3], np.int32)
pts = pts.reshape((-1,1,2))
img4 = cv2.polylines(img.copy(),[pts],True,(0,255,255))
cv2.imshow('image',img4)
cv2.waitKey()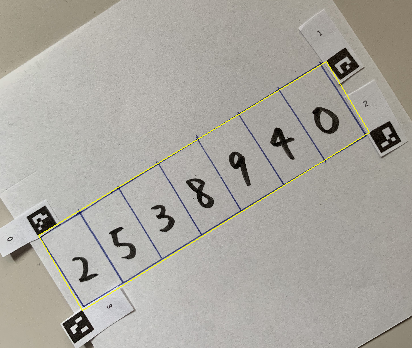
うまく取り出せました!
この座標を使って、affine変換してみます。
Affine変換
最初の4行でaffine変換しています。画像のアスペクト比が元の画像になっているので、5行目でresizeを実施しています。
1行目は、先ほど入手した座標をセットしています。
2行目は、元の画像の端の座標をセットしています。
3行目は、affine変換を計算するための行列を作っています。
4行目は、affine変換を行っています。
src_points = np.float32([[corner_0,corner_1,corner_3,corner_2]])
dst_points = np.float32([[0,0], [img.shape[0],0], [0,img.shape[1]], [img.shape[0],img.shape[1]]])
projective_matrix = cv2.getPerspectiveTransform(src_points, dst_points)
img_output = cv2.warpPerspective(img.copy(), projective_matrix, (img.shape[0],img.shape[1]))

halfImg = cv2.resize(img_output, (1000,300))
cv2.imshow('image',halfImg)
cv2.waitKey()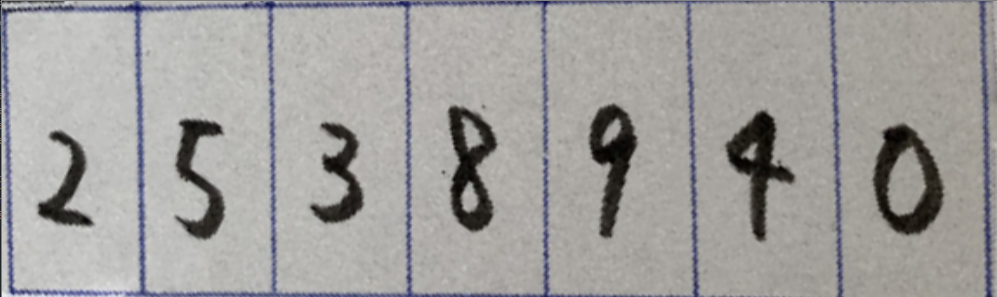
うおおおおおお!できた!!